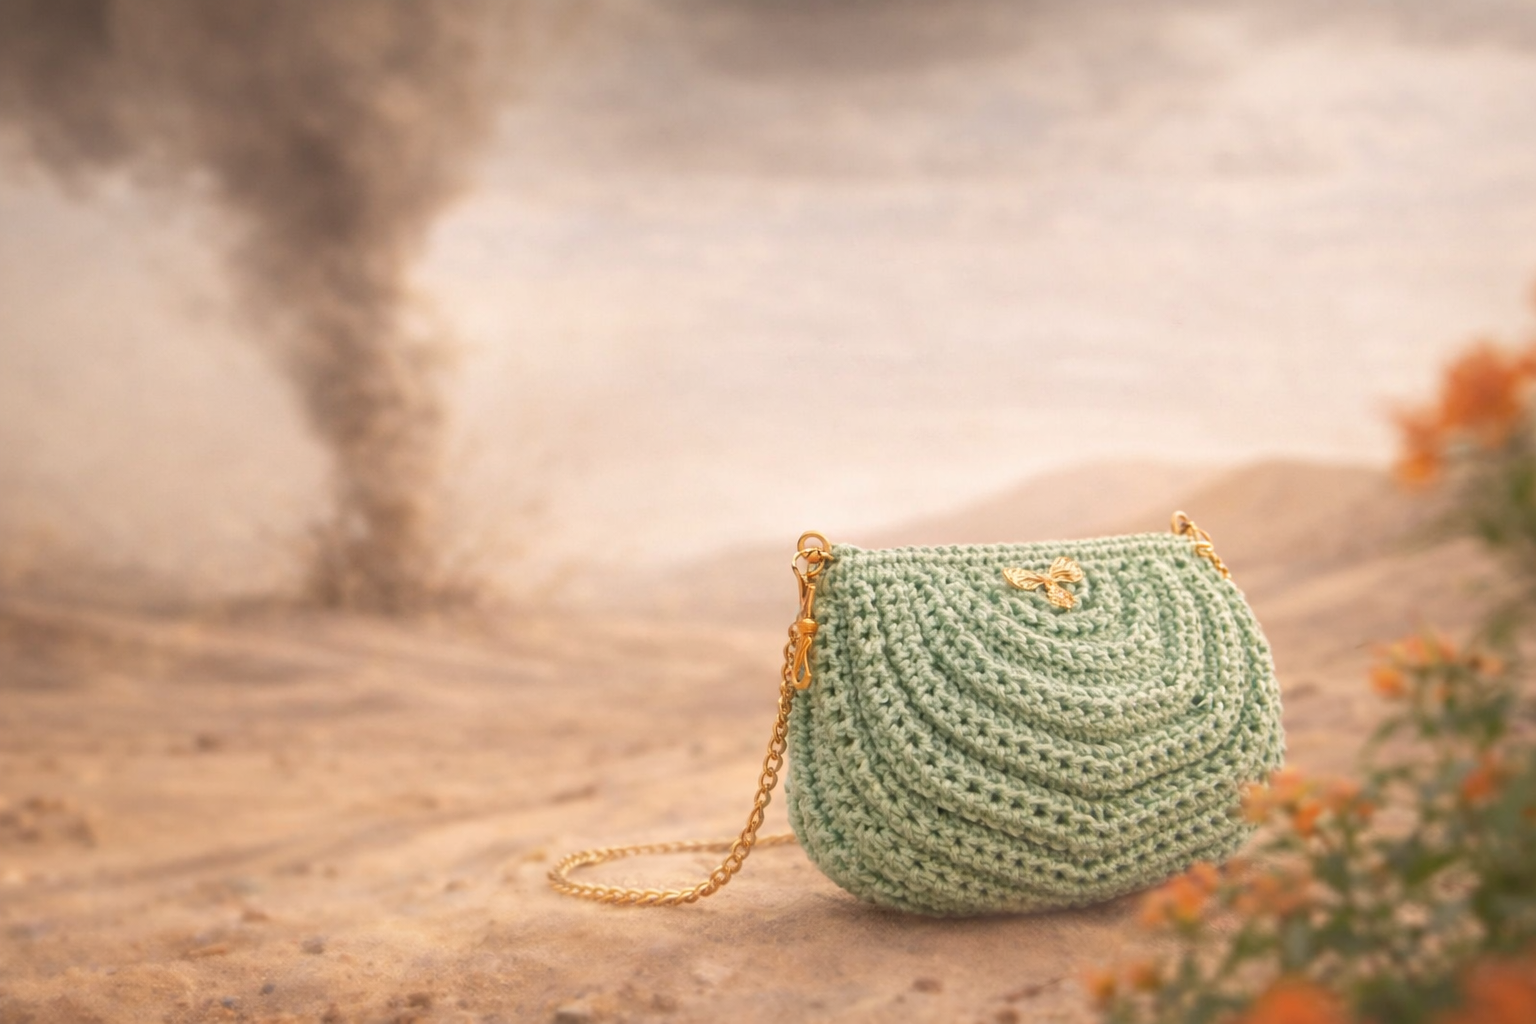
In this tutorial, you will learn step by step how to crochet a small bag with a new, elegant design using a simple and beginner-friendly method. The bag is suitable for everyday use as well as special occasions, combining simplicity with a clean and stylish look.
The pattern starts from the magic ring and walks you through the entire process, including shaping, edge finishing, zipper installation, and final assembly. By following the written pattern below, you can achieve a professional result and create a handmade crochet bag you can truly be proud of.
Final bag dimensions:
Width: 18 cm
Height: 15 cm
Depth: 7 cm
Stitch Abbreviations
sc = Single crochet
hdc = Half double crochet
inc = Increase (2 stitches in the same stitch)
sl st = Slip stitch
BLO = Back loop only

Yarn: Chain yarn (3 mm) 350 grams– can be replaced with any bag yarn
Hook: 5 mm

Base
Magic ring
Row 1: 3 sc in MR (3)
Pull tight
Ch 1, turn
Row 2: 3 inc (BLO) (6)
Ch 1, turn
Row 3: (1 sc, inc) × 3 (9 )
Row 4: (2 sc, inc) × 3 (12)
Row 5: (3 sc, inc) × 3 (15)
Row 6: (4 sc, inc) × 3 (18)
From Row 7, work as follows:
Row 7: 3 sl st (BLO) – 3 sc – (1 hdc, inc) × 3 – 3 sc – 3 sl st ( 21)
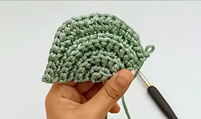
Continue with the same structure:
Each row starts with 3 sl sts
and ends with 3 sc + 3 sl sts.
The middle section is worked in hdc.
Row 8: 3 sl st (BLO) – 3 sc – (2 hdc, inc) × 3 – 3 sc – 3 sl st ( 24)
Row 9: 3 sl st – 3 sc – (3 hdc, inc) × 3 – 3 sc – 3 sl st (27)
Row 10: 3 sl st – 3 sc – (4 hdc, inc) × 3 – 3 sc – 3 sl st (30)
Row 11: 3 sl st – 3 sc – (5 hdc, inc) × 3 – 3 sc – 3 sl st (33)
Row 12: 3 sl st – 3 sc – (6 hdc, inc) × 3 – 3 sc – 3 sl st (36)
Row 13: 3 sl st – 3 sc – (7 hdc, inc) × 3 – 3 sc – 3 sl st (39)
Row 14: 3 sl st – 3 sc – (8 hdc, inc) × 3 – 3 sc – 3 sl st (42)
Row 15: 3 sl st – 3 sc – (9 hdc, inc) × 3 – 3 sc – 3 sl st (45)
Row 16: 3 sl st – 3 sc – (4 hdc, inc) × 3 – 3 sc – 3 sl st (48)
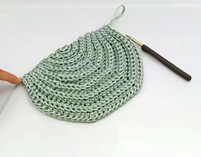
Plain Rows
Rows 17–18: 3 sl st + 3 sc + 36 hdc + 3 sc + 3 sl st (48)
(no increases)
Total rows so far: 18

Edge Finishing
Ch 1
Work slip stitches along the edge:
- Along the 12 rows that start and end with sl sts:
work 6 sl sts (1 st every 2 rows) - Along the 6 rows worked in sc:
work 6 sl sts (1 st per row)
Repeat on the second side.
Total: 12 sl sts per side.
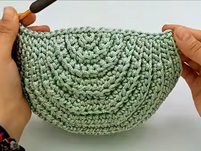
Work 2 more rows of
24 sl sts (BLO).
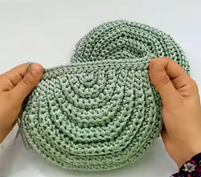
Second Piece
Make a second piece using the same steps and stitch counts.
Before cutting the yarn, leave a long tail for sewing.
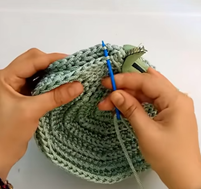
Zipper & Assembly
Cut the zipper to match the bag opening width.
Sew it below the first slip-stitch round.
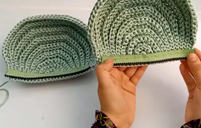
Join the two pieces on the wrong side,
working through one loop only from each side.
Add accessories as desired.

This written pattern is provided as a clear reference to follow the steps shown in the video and to help you achieve accurate shaping and assembly.
For a full visual explanation of the entire process — from the magic ring to zipper installation and final assembly — please watch the complete video tutorial here:
Video Tutorial
▶️ Watch the full crochet bag tutorial here:
This pattern is an original design by Amena Crochet Bags.
It is for personal use only.
Copying, reproducing, selling, or sharing this pattern or any part of it is not allowed.